Sema Image Sema Image

2026 Best Distance for Accurate Thermal Measurement?

Time:2026-10-17 Author:Sophia
0%

Accurate thermal measurement begins with one practical question: “What is the best distance for accurate thermal temperature measurement?” The answer depends on more than the camera’s advertised range. Target size, lens angle, infrared resolution, emissivity, reflected radiation, and atmospheric conditions all influence the reading. A hot pipe may appear precise from three meters, yet its surface temperature can be unreliable if it occupies only a few pixels.

Distance is only one variable. ASTM E1933, Standard Practice for Measuring and Compensating for Emissivity Using Infrared Imaging Radiometers, emphasizes emissivity control and measurement discipline. ISO 18434-1 also identifies target size, environmental reflections, and instrument limitations as important factors in infrared condition monitoring. These standards support a practical rule: the target should fill enough of the measurement area, while the operator avoids glare, steam, dust, and unstable surfaces.

A useful field method is to move closer until the target occupies the camera’s recommended measurement zone. Many manufacturers advise keeping the measured spot significantly smaller than the target, often using a 6:1 or better distance-to-spot ratio. However, this ratio is not universal. It varies by lens and detector design. A small electrical terminal may require close inspection, while a large furnace wall may be measured safely from farther away. That sounds simple.

In real work, the “best” distance may change within seconds. Reflections can shift as the operator moves. Wind can cool a surface. Even a clean lens cannot correct poor target geometry. This article examines practical distances, measurement errors, and field techniques for producing more defensible thermal readings in 2026.
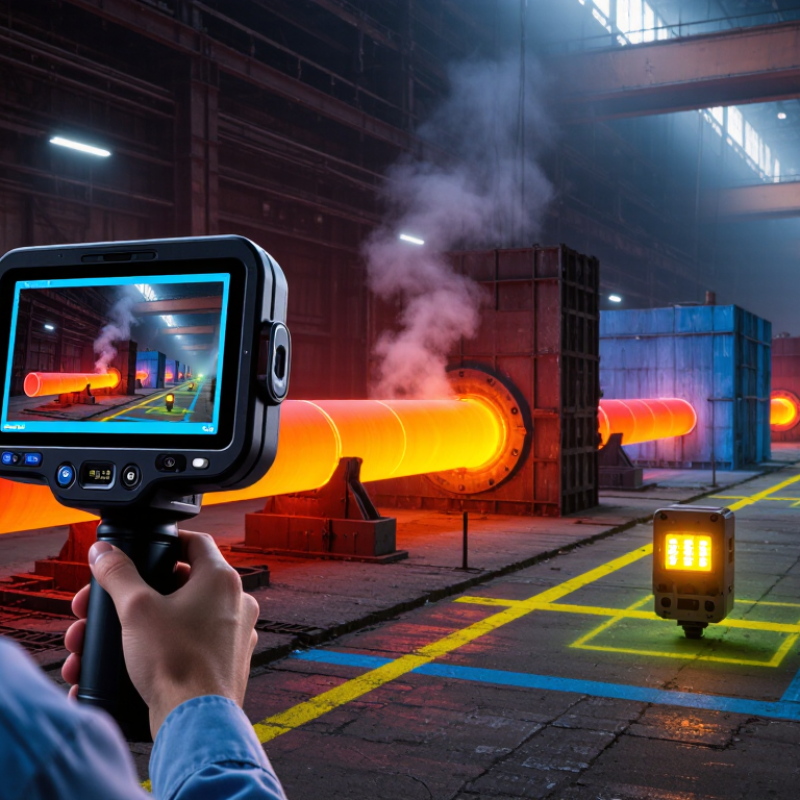
2026 Best Distance for Accurate Thermal Measurement?

Thermal Measurement Distance: Definition and Core Principles

2026 Best Distance for Accurate Thermal Measurement?
Thermal Measurement Distance: Definition and Core Principles

Thermal measurement distance is the space between the infrared sensor and the target surface. It directly affects spot size, focus, and measurement reliability. A 12:1 distance-to-spot ratio means a 12-centimeter area is measured from 1.44 meters away. That may sound precise, but a small target can still include its cooler surroundings.

ISO 18434-1 identifies field of view, measurement spot size, emissivity, and reflected temperature as key accuracy factors. ASTM E1933 also stresses proper emissivity assessment during infrared measurements. For a hot electrical connection, keep the target centered and fill most of the measurement spot. Avoid measuring through glass, steam, or heavy dust. These materials can distort infrared radiation.

Distance is not a fixed number. It depends on sensor optics, target size, surface condition, and air conditions. At longer distances, atmospheric absorption can become noticeable, especially across humid or dusty spaces. A practical field check is simple: measure a known surface at several distances and compare readings. If values drift, the distance is probably excessive. My own caution is this: a sharp image can still produce a wrong temperature. Appearance is not evidence. Even a carefully selected distance cannot correct poor emissivity settings or reflected heat from nearby metal surfaces.

2026 Best Distance for Accurate Thermal Measurement? - Thermal Measurement Distance: Definition and Core Principles

Use the distance-to-spot ratio (D:S) to estimate the smallest measurement spot. For dependable readings, the target should normally cover at least twice the calculated spot diameter, and the target surface should be free from obstructions.

Measurement Category Typical D:S Ratio Distance to Target Approximate Spot Diameter Recommended Minimum Target Diameter Best-Practice Use and Accuracy Conditions
Compact infrared thermometer 8:1 0.50 m 62.5 mm 125 mm or larger Suitable for large, nearby surfaces. Avoid measuring small components, narrow pipes, or targets partly covered by surrounding objects.
General-purpose infrared thermometer 12:1 0.50 m 41.7 mm 84 mm or larger A practical distance for electrical panels, HVAC surfaces, and larger mechanical parts when the target has a stable surface temperature.
Professional handheld thermometer 20:1 1.00 m 50.0 mm 100 mm or larger Useful when the operator cannot approach the target. Confirm that the measurement spot does not include nearby walls, insulation, flames, or cooler background areas.
Long-distance infrared thermometer 30:1 1.50 m 50.0 mm 100 mm or larger Appropriate for moderately distant equipment. A narrow field of view does not remove the need for correct emissivity and a clear line of sight.
Extended-range infrared thermometer 50:1 2.00 m 40.0 mm 80 mm or larger Useful for hot, moving, elevated, or difficult-to-reach targets. Keep the instrument perpendicular to reflective surfaces where possible.
High-distance infrared thermometer 75:1 3.00 m 40.0 mm 80 mm or larger Best for larger assets at a distance. Atmospheric moisture, dust, steam, and smoke can reduce infrared transmission and increase uncertainty.
Very-long-range infrared thermometer 100:1 5.00 m 50.0 mm 100 mm or larger Use only when the target is sufficiently large and unobstructed. Verify readings at a shorter distance whenever safe and practical.
Small target: 25 mm diameter 20:1 required Maximum 0.25 m 12.5 mm or less 25 mm A 20:1 instrument places a 12.5 mm spot at 0.25 m. A lower-ratio instrument must be moved closer or replaced with a closer-focus model.
Medium target: 50 mm diameter 20:1 required Maximum 0.50 m 25.0 mm or less 50 mm Keep the calculated spot no larger than half the target diameter to limit background influence and improve repeatability.
Large target: 100 mm diameter 20:1 required Maximum 1.00 m 50.0 mm or less 100 mm Suitable for large pipes, motor housings, process surfaces, and electrical enclosures when surface emissivity is known or controlled.
Thermal imaging camera Use IFOV and pixel coverage Distance depends on lens and resolution Determine from projected pixel size At least 3 × 3 pixels; preferably 10 × 10 pixels for small targets Do not rely only on the visible image. Ensure the target occupies enough detector pixels, focus the image correctly, and avoid measuring across mixed hot and cold areas.
Core calculation: Spot diameter = measurement distance ÷ D:S ratio. For example, at 1.00 m with a 20:1 ratio, the approximate spot diameter is 50 mm. For improved accuracy, position the instrument so the target diameter is at least twice the spot diameter.
Important accuracy factors: D:S describes spatial measurement capability, not total accuracy. Readings may also be affected by emissivity, reflected infrared radiation, viewing angle, surface condition, atmospheric absorption, target movement, instrument focus, and calibration. Always follow the instrument’s technical specification and verify critical readings using a known reference or a shorter measurement distance.

Factors That Affect Accurate Infrared Temperature Readings

2026 Best Distance for Accurate Thermal Measurement?

Factors That Affect Accurate Infrared Temperature Readings

Accurate infrared measurement depends on more than standing close to the target. Every thermometer has a distance-to-spot ratio, such as 12:1. At 12 inches, it may measure a 1-inch area. The target should fill the entire measuring spot. Otherwise, cooler surroundings can distort the result. I prefer measuring from the shortest safe distance and repeating the reading twice.

Surface emissivity also matters. Matte, dark surfaces usually provide more dependable readings than polished metal. Shiny steel may reflect a nearby lamp, window, or your clothing instead of showing its true temperature. This is easy to miss. A small piece of matte tape can provide a more stable reference area when appropriate. However, the tape must reach the same temperature as the surface.

Keep the sensor perpendicular to the target. Angled readings can increase reflection and reduce accuracy. Dust, moisture, steam, and moving air may also affect results. Allow the instrument to adapt to the surrounding temperature before use. Direct sunlight is another common problem. Shade the target when possible. Check calibration against a trusted reference regularly, especially after drops or extreme temperature changes. I sometimes record a reading that looks reasonable, then question it after noticing the target was partly outside the measurement area. Reliable practice includes documenting distance, angle, surface condition, and ambient temperature.

How to Calculate the Ideal Distance-to-Spot Ratio

2026 Best Distance for Accurate Thermal Measurement?

The ideal measurement distance depends on the distance-to-spot ratio, or D:S ratio. This ratio compares the camera’s distance from a target with the measured spot diameter.

For example, a 30:1 ratio produces a 1-centimeter spot from 30 centimeters away. Use this formula: maximum distance = target diameter × D:S ratio.

If a hot component measures 5 centimeters across, a 30:1 instrument should be about 150 centimeters away or closer.

Keep the target larger than the spot. Larger is safer. A small spot touching cooler surroundings can produce a misleading average temperature.

Field technicians often place the target within the central portion of the measurement circle. They also check the camera’s field of view, because D:S performance may change across viewing conditions.

A 2-centimeter fuse, for instance, needs a spot smaller than 2 centimeters, not equal to it.

Distance alone does not guarantee accuracy. Set the correct emissivity, avoid reflective surfaces, and measure near a right angle when possible.

Dust, steam, glass, and shiny metal can distort readings. Allow the instrument to stabilize before recording data.

That step is easy to skip. It should not be.

In practice, the stated D:S ratio may represent an ideal laboratory value, so a cautious operator leaves extra distance margin and verifies unusual readings with a closer measurement or a contact reference.

Step-by-Step Procedure for Measuring Temperature Accurately

2026 Best Distance for Accurate Thermal Measurement?

Accurate temperature measurement begins with the correct distance. Check the instrument’s distance-to-spot ratio before taking a reading. The target should fill the entire measuring area, not just its center. If the ratio is 12:1, measure a 12-centimeter target from no more than 1.44 meters away. Closer is usually safer.

Let the instrument and target share the same environment for several minutes. Remove dust, moisture, or loose coverings from the surface. Aim at a flat, dry area with a stable temperature. Keep the sensor perpendicular to the target, and avoid steam, strong airflow, and direct sunlight. Reflective metal can mislead the reading, so use a suitable matte reference surface when possible. Set the correct emissivity for the material. Small errors here can become large errors.

Take three readings from the same position. Record the distance, surface condition, ambient temperature, and measured values. If the results differ noticeably, pause and investigate instead of choosing the lowest number. I still find rushed readings tempting during field work. They often look precise but lack control.

Tips: Keep the lens clean. Avoid measuring through glass. Wait for the display to stabilize. Use a contact probe when surface reflection remains difficult. Recheck unusual results with a second method. Temperature readings are evidence, not certainty.

Common Distance Errors and Ways to Prevent Them

2026 Best Distance for Accurate Thermal Measurement?

Common Distance Errors and Ways to Prevent Them

Distance is not a fixed number in thermal measurement. It depends on detector resolution, target size, lens field of view, and environmental conditions. ISO 18434-1 stresses that the measured area must fill enough pixels for reliable analysis. A small target viewed too far away can blend with its background. The reading may look precise. It may still be wrong.

Check the instrument’s distance-to-size ratio before collecting data. A 30:1 ratio means one-centimeter details need about 30 centimeters of distance. This is only a geometric guide. Reflections, dust, airflow, and low emissivity can create larger errors. ASTM E1933 recommends documenting emissivity, reflected temperature, distance, and atmospheric conditions. Record them every time. Do not trust memory.

NIST Technical Note 1297 explains that expanded uncertainty commonly uses a coverage factor of two, representing roughly 95% confidence. Distance uncertainty should be included when results support maintenance decisions. Measure a known reference surface at several distances, then compare the readings. A stable reading is encouraging, not conclusive. I have seen operators move closer, yet accidentally capture a hotter background. The weak point is often not the sensor. It is the scene.

The chart shows the approximate spot diameter produced by a thermal imager with a 1° instantaneous field of view (IFOV). Spot diameter increases with distance, so a small target may be mixed with its background and produce an inaccurate temperature reading. For best accuracy, keep the target large enough to fully cover the measurement spot, move closer when safe, and avoid measuring through glass, steam, or reflective surfaces.

FAQS

What does thermal measurement distance mean?

It is the space between an infrared sensor and the target surface.

Is there one best distance for accurate thermal measurement?

No fixed distance works for every situation.

What does a 12:1 distance-to-spot ratio mean?

It means the sensor measures a 12-centimeter area from 1.44 meters away.

How large should the target be within the measurement spot?

The target should fill most of the measurement spot.

Why can polished metal produce inaccurate readings?

Shiny metal may reflect a lamp, window, or your clothing.

Can matte tape improve a reading?

A small piece of matte tape can create a steadier reference area.

What angle should the sensor use?

Hold the sensor as perpendicular to the target as possible.

Which environmental conditions can affect infrared readings?

Glass, steam, heavy dust, moisture, and moving air can interfere with infrared radiation.

How can I test whether the measurement distance is excessive?

Measure a known surface from several distances.

What should I document during thermal measurements?

Record distance, sensor angle, surface condition, and ambient temperature.

Conclusion

Accurate thermal measurement depends on choosing the correct distance between the infrared device and the target. What is the best distance for accurate thermal temperature measurement? The answer depends mainly on the instrument’s distance-to-spot ratio, target size, surface condition, and environmental factors such as airflow, reflections, humidity, and surrounding heat. The target should fully cover the measurement spot, and a shorter distance is often necessary for small objects.

To measure temperature reliably, check the device specifications, calculate the required distance using the distance-to-spot ratio, position the sensor at a suitable angle, and allow it to stabilize before recording the reading. Keep the lens clean, avoid reflective surfaces when possible, and take several readings to confirm consistency. Common mistakes include measuring from too far away, targeting an area that is too small, changing the angle, or ignoring emissivity and ambient conditions. Careful positioning and consistent technique help reduce errors and improve measurement accuracy.

Sophia

Sophia

Sophia is a dedicated marketing professional with an exceptional depth of knowledge about her company's products and services. With a keen understanding of market trends and customer needs, she crafts insightful blog posts that not only inform but also engage readers, enriching the company’s online......