Sema Image
Can thermal imaging detect pests or rodents inside ceilings? Sometimes, but it cannot see through ceiling materials like an X-ray. A thermal camera identifies temperature differences caused by movement, nesting, body heat, damaged insulation, or moisture. The image may show a warm oval near a light fixture, dark streaks along a joist, or a cool void behind insulation. These clues require careful interpretation.
The National Pest Management Association’s 2024 Bug Barometer reports continuing seasonal pressure from rodents and other pests across U.S. regions. Its findings support early inspection, especially around gaps, attic insulation, and roof penetrations. ASTM E1934 and ISO 18436-7 also emphasize controlled conditions, calibrated equipment, and trained thermographers. A camera is only one part of the investigation. Not proof.
Thermography educator John Snell has warned, “Thermal imaging is not an X-ray machine.” That limitation matters. A ceiling may hide a rodent when insulation, airflow, or electrical heat creates a stronger thermal signal. Experienced inspectors compare adjacent areas, scan during cooler periods, and confirm findings with sound, droppings, entry points, or non-invasive borescope checks. I might overread a bright thermal patch without those checks. That is the uncomfortable part.
This guide explains how to detect suspicious heat patterns, choose suitable camera settings, and avoid false conclusions. It also distinguishes pest evidence from moisture damage, overloaded wiring, and poorly sealed ductwork. Reliable results come from combining thermal data with building knowledge and licensed pest-management expertise.
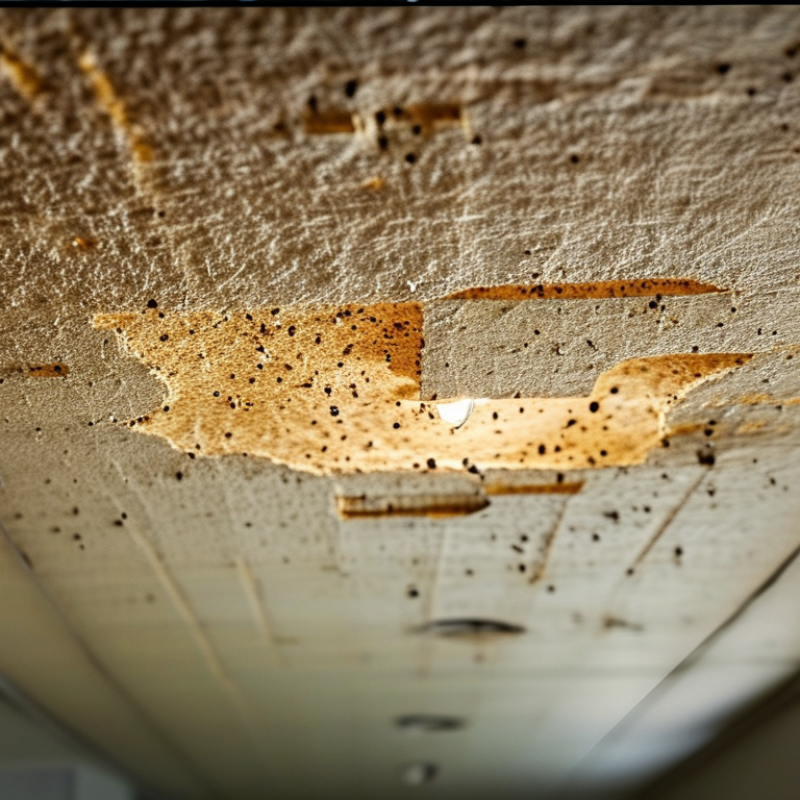
Thermal imaging detects temperature differences across ceiling surfaces, not pests directly. In practice, a hidden nest may appear as a warmer or cooler patch. Insects and rodents can disturb insulation, create airflow, or gather near warm wiring. These changes form useful clues. A ceiling corner may show a narrow, uneven band. That pattern can suggest movement behind drywall. However, one image never proves an infestation. Sunlight, plumbing, damp insulation, and recessed lights can create similar signals. Experienced inspectors compare several areas and scan at different times. They also check for droppings, scratching sounds, gnaw marks, and entry gaps. This layered method reduces false conclusions. Thermal evidence remains helpful, but it is not perfect.
Tips: Scan when indoor temperatures are stable. Keep heating or cooling conditions consistent. Record room temperature, ceiling location, and image timing. Look for repeated anomalies, not isolated colors. Reflective surfaces can mislead the camera. Do not open the ceiling based on thermal evidence alone. Confirm suspected activity with a qualified pest professional, especially near electrical systems. A careful inspection should admit uncertainty. Thermal tools locate attention points, but they cannot identify every species or reveal all hidden damage.
Before scanning, clear light fixtures, stored boxes, and loose insulation from the suspected ceiling area. Keep occupants away while access panels are opened. Dust can hide small temperature differences. Wear suitable eye and respiratory protection.
The U.S. Environmental Protection Agency recommends indoor relative humidity between 30% and 50%. Record humidity, room temperature, and recent weather before imaging. Heating or cooling the room for several hours can create stronger thermal contrast. Turn off ceiling fans, avoid direct sunlight, and close nearby windows. Mark visible stains, droppings, cracks, or scratching sounds on a simple ceiling sketch. Thermal images show heat patterns, not pests themselves.
Choose a camera with at least 320 × 240 infrared pixels for detailed ceiling work. A thermal sensitivity of 50 millikelvins or lower helps reveal subtle voids and moisture differences. Select adjustable emissivity, manual focus, radiometric recording, and a wide-angle lens. ISO 6781-3:2015 stresses controlled conditions and competent interpretation for building thermography. Use a lower measurement range when possible, but do not trust one image. Scan slowly from several angles, then compare suspicious areas with an undisturbed ceiling. Pests may share similar signatures with wet insulation, air leaks, wiring, or framing. I once treated a cool patch as animal activity; it was a poorly sealed duct. That mistake still matters. Verify every anomaly with visual inspection or a qualified pest professional.
| Category | Recommended Practice or Specification | Why It Matters for Ceiling Pest Inspection | Practical Check |
|---|---|---|---|
| Inspection objective | Use thermal imaging to locate abnormal temperature patterns that may indicate pest activity, nesting, airflow changes, moisture, or damaged insulation. | A thermal camera does not normally identify insects or rodents directly; it identifies heat signatures and building anomalies that require confirmation. | Treat every thermal anomaly as an indication for further investigation, not as proof of infestation. |
| Ceiling access | Inspect visible ceiling surfaces first, then assess accessible attic spaces, service voids, vents, and removable panels without damaging the structure. | Obstructions and multiple ceiling layers can weaken or distort the thermal pattern. | Record ceiling construction, access points, insulation depth, ducts, pipes, and electrical fixtures before scanning. |
| Environmental stability | Scan after the indoor temperature has been reasonably stable and avoid rapidly changing conditions such as direct sunlight, active heating, or strong drafts. | Rapid temperature changes can create false hot or cold areas unrelated to pests. | Note indoor and outdoor temperatures, weather, HVAC operation, and recent solar exposure. |
| Heating and cooling controls | Document whether heating, cooling, fans, and ventilation systems are operating during the inspection. | Air movement and conditioned surfaces can resemble localized pest-related temperature differences. | Compare images with HVAC on and off only when safe and practical, and label each condition. |
| Surface preparation | Remove or move temporary obstructions where possible, and keep the inspection surface dry and visible. | Objects, wet patches, glossy coatings, and strong reflections can obscure or imitate thermal anomalies. | Do not scan through furniture, thick coverings, glass, or other materials that block infrared radiation. |
| Camera spectral range | Select a long-wave infrared camera operating approximately in the 8–14 µm range for common building inspections. | This range is widely used for measuring surface temperatures in ordinary indoor and outdoor building environments. | Confirm that the camera is intended for non-contact surface-temperature measurement. |
| Thermal sensitivity | Prefer a noise-equivalent temperature difference (NETD) of 50 mK or lower; lower values indicate greater sensitivity. | Small temperature differences around a nest, animal pathway, moisture pocket, or insulation gap may be subtle. | Use the manufacturer’s stated NETD under the relevant operating conditions. |
| Thermal resolution | A minimum of 160 × 120 thermal pixels is suitable for basic surveys; 320 × 240 or higher provides more detail for larger or complex ceilings. | Higher resolution makes it easier to separate small anomalies from surrounding ceiling materials at a practical distance. | Choose resolution based on ceiling height, inspection distance, and the size of the suspected area. |
| Field of view and distance | Use a wide field of view for room-scale screening and move closer or use a narrower field of view for detailed checks. | The target must occupy enough pixels for a meaningful comparison with nearby surfaces. | Avoid relying on a very small target viewed from far away; capture overview and close-up images. |
| Temperature measurement range | A range covering at least approximately −20°C to 120°C is generally sufficient for ordinary building interiors and ceiling surfaces. | Most indoor ceiling inspections involve moderate surface temperatures rather than extreme industrial conditions. | Verify that the selected measurement range includes the expected indoor and attic temperatures. |
| Emissivity setting | Use an emissivity value appropriate to the surface; many painted, matte building surfaces are commonly approximated near 0.90–0.95, but the value should be verified when accuracy matters. | Incorrect emissivity can produce inaccurate temperature readings, especially on reflective materials. | Be cautious with metal, polished surfaces, foil-faced insulation, and glossy finishes; use a high-emissivity reference spot when possible. |
| Reflected temperature | Account for reflected infrared radiation when measuring shiny or low-emissivity surfaces. | Reflections from lights, windows, people, or heating equipment may appear as false hot spots. | Change viewing angle and compare the area with adjacent surfaces before interpreting the result. |
| Image documentation | Capture thermal images together with matching visible-light photographs, room location, distance, and environmental notes. | A visible image helps identify vents, beams, wiring, water stains, and other features that explain the thermal pattern. | Use consistent file names and mark the anomaly location on a ceiling plan or room sketch. |
| Confirmation method | Confirm suspected pest activity with visual inspection, accessible-space examination, sound or odor evidence, droppings, damage, monitoring devices, or a qualified pest professional. | Thermal patterns are not unique to pests and can also result from moisture, insulation defects, air leakage, or building services. | Do not open concealed areas or disturb electrical, structural, or hazardous materials without appropriate authorization and safety controls. |
| Safety requirements | Use suitable ladders, fall protection, personal protective equipment, and electrical-safety procedures when accessing ceilings or attic spaces. | Ceiling voids may contain live wiring, sharp components, fragile surfaces, mold, insulation fibers, or unstable access areas. | Stop the inspection if structural damage, exposed wiring, suspected hazardous materials, or unsafe access is present. |
Thermal imaging does not “see” pests through a ceiling. It maps surface temperatures. That distinction matters. When insects, rodents, or nests disturb insulation, airflow, or moisture, the ceiling may show a warmer or cooler patch. The U.S. Department of Energy’s Infrared Thermography Guide links thermal anomalies with insulation gaps, air leakage, and moisture conditions. These are clues, not proof. Scan slowly in a stable room. Record indoor temperature, humidity, and recent heating activity. A temperature difference near 1°C can justify a closer inspection, but it is not a universal threshold.
Look for irregular halos, narrow trails, repeated spots, or sagging edges. Compare the suspicious area with an undisturbed section of the same ceiling. ASTM E1933-20 emphasizes consistent measurement conditions and calibrated equipment for reliable infrared readings. That means a cold ceiling corner may reflect an exterior bridge, not a colony. The U.S. Environmental Protection Agency recommends keeping indoor relative humidity around 30–50%; persistent readings above this range can support moisture-related pest activity. Openings, frass, droppings, scratching sounds, and damaged timber should be checked separately. Do not drill immediately. A reflective paint patch can mislead the camera. So can a ceiling fan. My practical mistake was treating one bright spot as evidence; it was a hidden light fixture. Re-scan after conditions change.
Thermal imaging can reveal unusual temperature patterns inside ceilings, but it cannot identify pests directly. In field inspections, a small, shifting hotspot near a light fitting, vent, or ceiling joint may suggest nesting activity. Look for repeated signs at different times, especially around dawn or after the room becomes quiet. Droppings, scratching sounds, and damaged insulation can support the thermal evidence.
Moisture usually creates a broader, irregular area with cooler edges from evaporation. A damp patch may also follow a roof seam or plumbing route. Wiring problems often appear as narrow, linear hotspots, particularly when a circuit is carrying a load. Do not open the ceiling or touch suspected wiring; arrange a qualified electrical inspection. Missing insulation produces sharp temperature changes, often following joists or forming a consistent cold strip.
Pest-related heat tends to be localized and changeable. Insulation gaps usually remain stable. Moisture patterns may expand after rain or plumbing use. These distinctions are useful, but they are not absolute. An experienced inspector can still mistake a warm pipe for animal movement. Reflected sunlight, ventilation, and recent heating can distort the image. Record indoor conditions, scan from several angles, and compare images over time. Confirm suspicious areas with visual checks, sound monitoring, or a careful access inspection rather than relying on one bright spot.
A thermal image can reveal a warm or cool area inside a ceiling, but it cannot identify the pest by itself.
A warm patch is a clue, not proof.
Experienced inspectors confirm the reading with visible signs, scratching sounds, droppings, nesting material, or damaged insulation. They also compare nearby ceiling areas and check for plumbing leaks, wiring, and ventilation changes.
Conditions matter. Sunlight, recessed lighting, damp plaster, and trapped air can create false patterns. A second scan at a different time may produce a clearer result. A small, controlled inspection opening can confirm activity, but it should never be made directly below suspected wiring or structural joints. I have found that rushing this step creates more repair work than necessary.
After confirming pest activity, map the affected area and identify safe access points. Plan removal around the pest type, entry route, ceiling materials, and nearby occupants. Do not seal an opening before confirming that animals or insects have left; trapped pests may cause odor, damage, or renewed movement. Use suitable protective equipment, contain dust and debris, and keep children and pets away from the work zone.
A qualified pest professional should assess difficult access, contamination, or electrical hazards. Removal methods should avoid unnecessary damage and prevent pests from returning. Close entry points only after the source is addressed. Record thermal images, inspection notes, and repair locations. Small details often change the safest plan.
: It shows temperature differences across ceiling surfaces. A warm or cool patch may suggest hidden activity. It does not show pests directly.
Sunlight, plumbing, damp insulation, wiring, and recessed lights can look suspicious. Air leaks may create narrow, uneven bands. One image proves very little.
Scan when indoor temperatures remain stable. Keep heating and cooling conditions consistent. Turn off ceiling fans and close nearby windows. A second scan may reveal a clearer pattern.
Remove stored boxes, loose insulation, and nearby fixtures. Record room temperature, humidity, weather, and image timing. Indoor humidity around 30% to 50% is generally suitable. Keep children and pets away.
Choose at least 320 × 240 infrared pixels for detailed work. Sensitivity of 50 millikelvins or lower can reveal subtle differences. Manual focus and adjustable emissivity are useful. Radiometric recording helps compare readings later.
Compare the suspicious area with an undisturbed ceiling. Look for droppings, scratching sounds, gnaw marks, or nesting material. Check entry gaps and damaged insulation. A qualified pest professional should assess difficult cases.
No. A hot patch is not proof. Plumbing leaks and poorly sealed ducts can look similar. Never cut near suspected wiring or structural joints. I once misread a cool patch. It was a duct problem.
Map the affected area and plan safe access. Do not seal entry points before pests have left. Otherwise, trapped animals may create odor or further damage. Protect nearby occupants from dust and debris. Record images, findings, and repair locations.
Thermal imaging offers a practical, non-invasive way to investigate possible pests hiding inside ceilings. By detecting differences in surface temperature, it can reveal heat patterns linked to animal activity, nesting areas, movement, or concentrated body heat that may not be visible from below. Before scanning, the ceiling area should be cleared of obstacles, lighting conditions considered, and a suitable thermal camera selected for the ceiling material, room size, and expected detection range. Can thermal imaging detect pests or rodents inside ceilings? It can identify suspicious thermal anomalies, but it cannot confirm the exact species or cause on its own.
A careful inspection should compare warm and cool patterns across the ceiling while noting irregularities in construction, ventilation, and insulation. Similar signatures may result from moisture, electrical wiring, air leaks, or uneven insulation, so findings must be checked against visible evidence such as droppings, scratching sounds, odors, or small openings. Once activity is reasonably confirmed, the next step is to plan safe, humane removal and repair measures with a qualified pest-control professional.
