Sema Image Sema Image

7 Best Tips to Integrate Thermal Sensors into Smart Homes

Time:2026-11-13 Author:Mason
0%

Thermal sensors can make a smart home more responsive by detecting heat patterns that ordinary motion sensors may miss. They can help adjust heating and cooling, flag unusual temperature changes, or support room-by-room comfort. But useful results depend on placement, sensor range, calibration, and the devices already connected. A unit aimed at a sunny window may report a misleading shift. Small details matter.

How to integrate thermal sensors into existing smart home systems is a practical question, not just a shopping choice. This guide explores seven useful tips, from checking hub and protocol compatibility to choosing locations and testing automations. It also considers how sensor data can work alongside thermostats, lights, and other connected devices. Start with one room. Observe the readings at different times of day, then adjust settings gradually. That simple test can reveal blind spots before they affect the whole home.

Thermal readings are not automatically accurate or useful in every setting. Room layout, pets, vents, and changing sunlight can affect results. Privacy and account security deserve attention too, especially when sensors connect to cloud-based services. Check the manufacturer’s specifications and keep firmware updated. No single setup suits every home, and early assumptions may need revision. The tips ahead offer a careful starting point for building a reliable system without expecting sensors to solve every comfort problem.
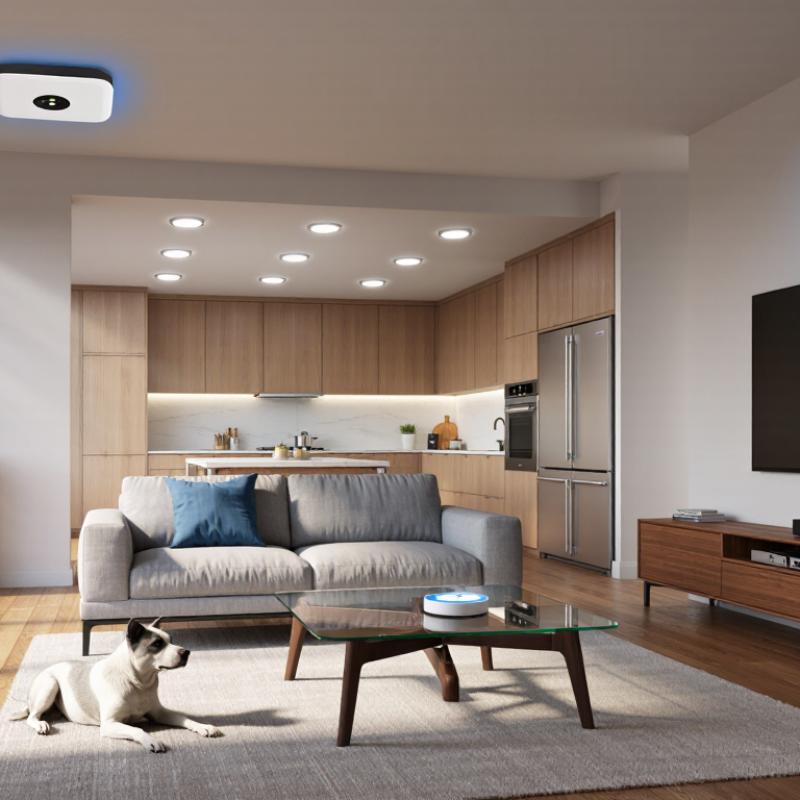
7 Best Tips to Integrate Thermal Sensors into Smart Homes

Assessing Smart Home Needs Before Selecting Thermal Sensors

Before choosing thermal sensors, identify the problem you want to solve. A hallway may need occupancy detection, while a nursery may need temperature alerts. These are different tasks. Thermal sensors detect heat patterns, but they do not always distinguish a person from a warm appliance. Note the room’s size, typical temperature changes, and where sunlight falls during the day. A south-facing window can distort readings. Small details matter.

Tip: Write down the needed response. Should a light turn on, should heating adjust, or should you receive an alert? Check whether your home hub supports the sensor’s connection method and whether it can trigger that action. Compatibility claims can be vague, so verify the specific feature before buying.

Tip: Plan placement before installation. Keep sensors away from radiators, vents, and direct sunlight, then test them at different times. A sensor near a doorway may miss someone sitting still across the room. That surprised me in a real setup. Also consider how long readings are stored and who can access them. You may not need detailed temperature histories. Choose a model and location that collect only what your household actually needs.

Choosing Sensor Types, Accuracy, and Connectivity

Choosing a sensor starts with what you need to measure. A thermistor or digital temperature sensor can track room air for heating control. An infrared sensor reads surface temperature, such as a sunny windowsill or radiator. It does not directly tell you the room’s air temperature. Match the sensor type to the job. Placement matters. Keep room sensors away from direct sunlight, vents, and exterior doors. Check the manufacturer’s stated accuracy range, not just its displayed decimal places. Resolution and accuracy are different. A reading of 21.4°C may still be off by several tenths of a degree.

Connectivity affects both reliability and upkeep. Wi-Fi sensors can connect directly to a home network, but frequent transmissions may use more battery power. Zigbee and Thread devices often need a compatible hub or border router. Matter supports interoperability, but check that your existing controller supports the device’s connection method. Test the signal where the sensor will live, especially behind thick walls or inside a closed room. Test the signal. Compare readings beside a trusted thermometer and allow time for both devices to settle. A tidy specification sheet can still hide practical frustrations, like slow updates or awkward placement. I would leave room to adjust the setup after a few days of real use.

Planning Sensor Placement for Reliable Temperature Readings

A thermal sensor can only guide a smart home well when it measures the air people actually feel. Mount it about 1.2 to 1.5 metres above the floor, on an interior wall where air can circulate. Keep it away from direct sunlight, windows, exterior walls, heating vents, and appliances that release heat. Even a nearby lamp can distort readings in a small room. Small details matter.

Choose a location that represents the room, not just the easiest place to install a sensor. In a bedroom, avoid placing it behind curtains or close to a bedside radiator. In an open-plan home, one sensor may miss cooler air near the floor or a warm patch beside a kitchen. Separate zones may need separate readings.

After installation, compare the sensor with a trusted thermometer over several hours, and check again when heating or cooling runs. A few degrees of difference can change automated settings, so do not rush calibration. Placement is rarely perfect on the first try; furniture and seasonal sunlight can reveal problems later.

Keep a simple note of readings and adjustments. It helps distinguish a real room change from a sensor sitting in the wrong spot.

Connecting Sensors to Hubs, HVAC Systems, and Smart Platforms

A thermal sensor works best when its readings reach the right parts of the home. Check that its communication method is supported by the hub before installation. Wireless signals can weaken behind masonry or metal ductwork, so test the connection at the intended location. A sensor near a sunny window may report heat that does not represent the room. Small details matter.

For HVAC integration, confirm that the hub or thermostat can use the sensor as an input. Some systems average readings from several rooms; others let you prioritize one zone. Keep sensors away from supply vents, radiators, and direct sunlight. These sources can trigger unnecessary heating or cooling. Set gradual temperature thresholds, and allow a short delay before changing HVAC operation. That reduces rapid cycling. Check the equipment instructions before connecting control wires or relays.

Smart platforms can combine thermal readings with occupancy, schedules, or open-window sensors. For example, a room sensor might lower heating when nobody is present, then restore a comfortable setting before arrival. Give each sensor a clear room name, and compare its reading with a trusted thermometer during setup. If values differ, check placement and calibration before building automations. I would not treat one reading as unquestionable; rooms change, and sensors can drift. Test routines during ordinary daily use, including when the hub briefly loses its network connection.

Thermal Sensor Readings Across a Smart Home

Illustrative room temperatures compared with a 21°C HVAC target. Consistent sensor placement and reliable hub connections help smart platforms use readings effectively.

Testing Automations, Protecting Data, and Maintaining Sensors

Testing automations matters more than adding another sensor. Place one near the room’s center, away from sunlight, vents, and warm electronics. Then compare its reading with a trusted thermometer at morning and evening. A handheld check is useful; a polished dashboard can still be wrong. Test heating and cooling triggers at realistic thresholds, and confirm that doors, pets, or a brief draft do not cause needless cycling. The U.S. Department of Energy says adjusting a thermostat by 7–10°F for eight hours daily can save up to 10% yearly on heating and cooling. Treat that as a potential, not a promise: insulation and household habits change results.

Protect the readings and the account controlling them. Thermal data can reveal when rooms are occupied, even without a camera. Use unique passwords, enable multifactor authentication where available, and limit access to household members who need it. Review storage and sharing settings before connecting sensors to other services. NIST’s NISTIR 8259A recommends baseline IoT security capabilities, including protecting device data and restricting logical access. Keep sensor software updated, and remove old integrations you no longer use.

Maintenance is simple, but easy to forget. Dust sensors gently, check batteries on a calendar, and note readings before and after replacement. If a sensor drifts, verify its location before changing automation rules. For combined temperature and humidity devices, the EPA recommends indoor humidity around 30–50%; readings outside that range deserve a closer look, not an automatic diagnosis. A short monthly check is less exciting than a new automation. It is often more useful.

7 Best Tips to Integrate Thermal Sensors into Smart Homes - Testing Automations, Protecting Data, and Maintaining Sensors

Tip What to Do How to Test or Verify Privacy and Maintenance
1. Choose a sensor that fits the task Use a temperature sensor for room or pipe temperature, a passive infrared (PIR) sensor for motion-related presence, or a thermal imager when temperature patterns across an area are needed. Check that the sensor can connect to the home controller or supported integration. Confirm the sensor reports the expected measurement and units, and that its readings appear in the intended smart-home system. Prefer a sensor that provides only the information required for the automation. Review what data it stores and where that data is processed.
2. Place sensors carefully Keep temperature sensors away from direct sunlight, heating vents, exterior drafts, and appliances that can create local heat. Follow the sensor’s installation guidance and avoid placing it where furniture blocks airflow. Compare readings with a separate, suitable thermometer after the sensor has had time to stabilize. Check for large differences between locations before using readings to control heating or cooling. Inspect the mounting point periodically. Avoid locations where moisture, dust, or physical contact could damage the device.
3. Define clear automation thresholds Set temperature limits appropriate to the room and purpose. Use separate activation and deactivation thresholds where available to reduce frequent on-off switching near a single setpoint. Test readings just below, at, and above each threshold. Confirm the intended action occurs and that the automation does not repeatedly switch when readings fluctuate slightly. Document the chosen thresholds and revisit them when room use, heating equipment, or household needs change.
4. Test automations in realistic conditions Check schedules, occupancy conditions, delays, and interactions with other rules. Include expected situations such as an open window, a vacant room, or a temporarily high reading. Run controlled tests and review the automation history. Verify both the trigger and the resulting action, including any notification or device response. Use a manual override or safe fallback for automations that operate heating, cooling, or other equipment. Do not rely on a sensor as the sole safety control.
5. Protect sensor data and access Use a secure home network, strong unique account credentials, and multi-factor authentication where available. Limit access to the sensor and its data to people and services that need it. Review account permissions, connected integrations, and available security settings. Remove access that is no longer required. Check retention and sharing settings. Temperature readings can reveal routines when associated with time, location, or occupancy data.
6. Check accuracy and connectivity Watch for missing readings, implausible jumps, stale values, or frequent connection drops. Keep the sensor within the communication range recommended for the home system. Compare readings over time with a reference thermometer in the same location, accounting for differences in placement and response time. Confirm the system flags unavailable sensors. Replace batteries when indicated by the device or system. Install software updates through the device’s supported update process.
7. Maintain sensors on a schedule Inspect the sensor and its surroundings periodically for dust, obstruction, loose mounting, corrosion, or signs of damage. Clean only as directed by the device instructions. After cleaning, battery replacement, relocation, or an update, confirm that readings and automations still work as intended. Record installation and maintenance dates. Replace a sensor that remains unreliable after basic troubleshooting, and dispose of batteries according to local guidance.

FAQS

What should I decide before choosing a thermal sensor?

Decide what response you need: a light turning on, heating adjusting, or an alert. A hallway and a nursery may need different functions. Write down the task.

Where should I place a thermal sensor?

Keep it away from sunlight, vents, radiators, and warm electronics. A sunny window can skew readings. Test the sensor at different times of day.

Can a thermal sensor tell a person from a warm appliance?

Not always. It detects heat patterns, which may overlap. Test it in the room, especially if a heater or other warm device is nearby.

How can I check whether a sensor works with my hub or heating system?

Verify the exact connection method and supported actions before installation. Some systems average readings; others let you prioritize a room. Check equipment instructions before connecting control wires or relays.

How do I test temperature readings and automations?

Compare readings with a trusted thermometer in the morning and evening. Test realistic thresholds and short delays. A polished dashboard can still be wrong.

What can cause unnecessary heating or cooling?

A vent, brief draft, open door, or sunny window may distort readings. Gradual thresholds and a short delay can reduce rapid cycling. Check routines during ordinary use.

What should I consider about sensor data and account access?

Room readings may suggest when people are home. Review storage and sharing settings, use a unique password, and limit account access. Small details matter.

How should I maintain thermal sensors?

Gently remove dust, check batteries on a calendar, and compare readings after replacement. If readings drift, check placement before changing automation rules. A monthly check helps.

Conclusion

Integrating thermal sensors into a smart home begins with understanding what you want to monitor, such as room comfort, uneven temperatures, or heating and cooling performance. How to integrate thermal sensors into existing smart home systems depends on choosing sensors that suit each task, with appropriate accuracy and reliable connectivity. Before installation, consider the home’s layout and place sensors away from direct sunlight, drafts, appliances, and other sources of misleading heat.

Next, connect the sensors to a compatible hub, HVAC system, or smart home platform, and confirm that readings arrive consistently. Use those readings to create practical automations, such as adjusting heating or cooling when a room moves outside a comfortable range. Test each rule under different conditions and refine its settings to avoid unnecessary changes. Protect sensor data with secure account practices, and keep devices clean, powered, and properly calibrated. Regular checks help maintain accurate readings and dependable performance over time.

Mason

Mason

Mason is a seasoned marketing professional with a deep expertise in the company's offerings and a passion for driving brand awareness. With a strong background in digital marketing strategies, he has an innate ability to connect with diverse audiences and effectively communicate product benefits.......